
The outer fabric I used is this sweet Prince Charming laminate by Tula Pink. I used this a while back to make a messenger bag for my niece Amanda, and I had enough left over for this project. The lining is just some flowery cotton I had in my stash.
The pieces are easy: just three rectangular pieces. The front and back are 5.25 x 16.25", the sides are 5.25 x 11.25, and the bottom is 5.25 square. These dimensions include a 5/8" seam allowance all around. I used newsprint for my pattern pieces. For the oval, I used a honey jar and traced around it. You could also do a rectangular cut-out if you prefer the look, or a circle, or something you drew freehand, if that pleases you. I'm going to refer to it as the oval, here, to keep it simple.
Cut 2 of the front/back, 2 of the sides, and 1 of the bottom piece from each of your exterior fabric, your lining fabric, and heavy interfacing (I used Timtex that turned out to be double-sided iron-on, though I did not iron it on until after I sewed). For interfacing, I tend to cut out pieces without the seam allowance, in this case 4x15, 4x10, and 4x4.
 The only marking that needs to be transferred to the fabric is the oval, and you put the marks on the wrong side of the lining. I used marking paper. First I used my tracing wheel, but that leaves dotted lines, and the lining was so busy it was impossible to see the marks, plus it basically cut through the paper of my pattern piece. So (after taping the oval in place) I used an unclicked ball point to press a more solid line of marking. Here you see. It's still pretty faint, but visible enough. I ended up going over that with a pencil to make sure I could see it when I started sewing.
I started the sewing part with this oval, as one of the harder parts of the project. You place the lining and the exterior with right sides together, and sew along the marked line. After you sew, you need to cut out the interior of the oval, and clip (carefully!) to give ease along the entire oval edge.

 If you click to enlarge this picture at left, you can see that I cut little triangles out all along that edge. (I am still finding tiny fabric triangles all over my house.) After clipping, pull the piece inside out, and iron the edge. If you are using _____ fabric, you'll want to use an ironing cloth to protect the surface. See this pic at right? It looks great once it's ironed, but the clipping is required to allow it to bend enough and not pucker.
The next few steps are what you would probably expect. I sewed the fronts, backs, and sides together, and then that combined unit to the bottom piece, for both outside fabric and lining.
Here is the second hard part: Before you sew the lining pieces together, you will need to flip them through one side (between the outside and lining connections at the ovals) so you can sew together inside out. Then you pull back through.
 |
 |
 |
Third hard part: inserting the interfacing. This was my first time using Timtex. Since it was heavy, I didn't iron it to the lining before sewing, but the next time I used the iron-on type I definitely will. It just eliminates a whole step and all the fiddly business of inserting the pieces into a sewn-together, tight space. I had to cut a little extra out of the hole to get it to fit, and also I had to slice through the top (as you see in the third pic above) to put it into place. Meh. So, yeah, next time, attach to fabric before sewing fabric together.
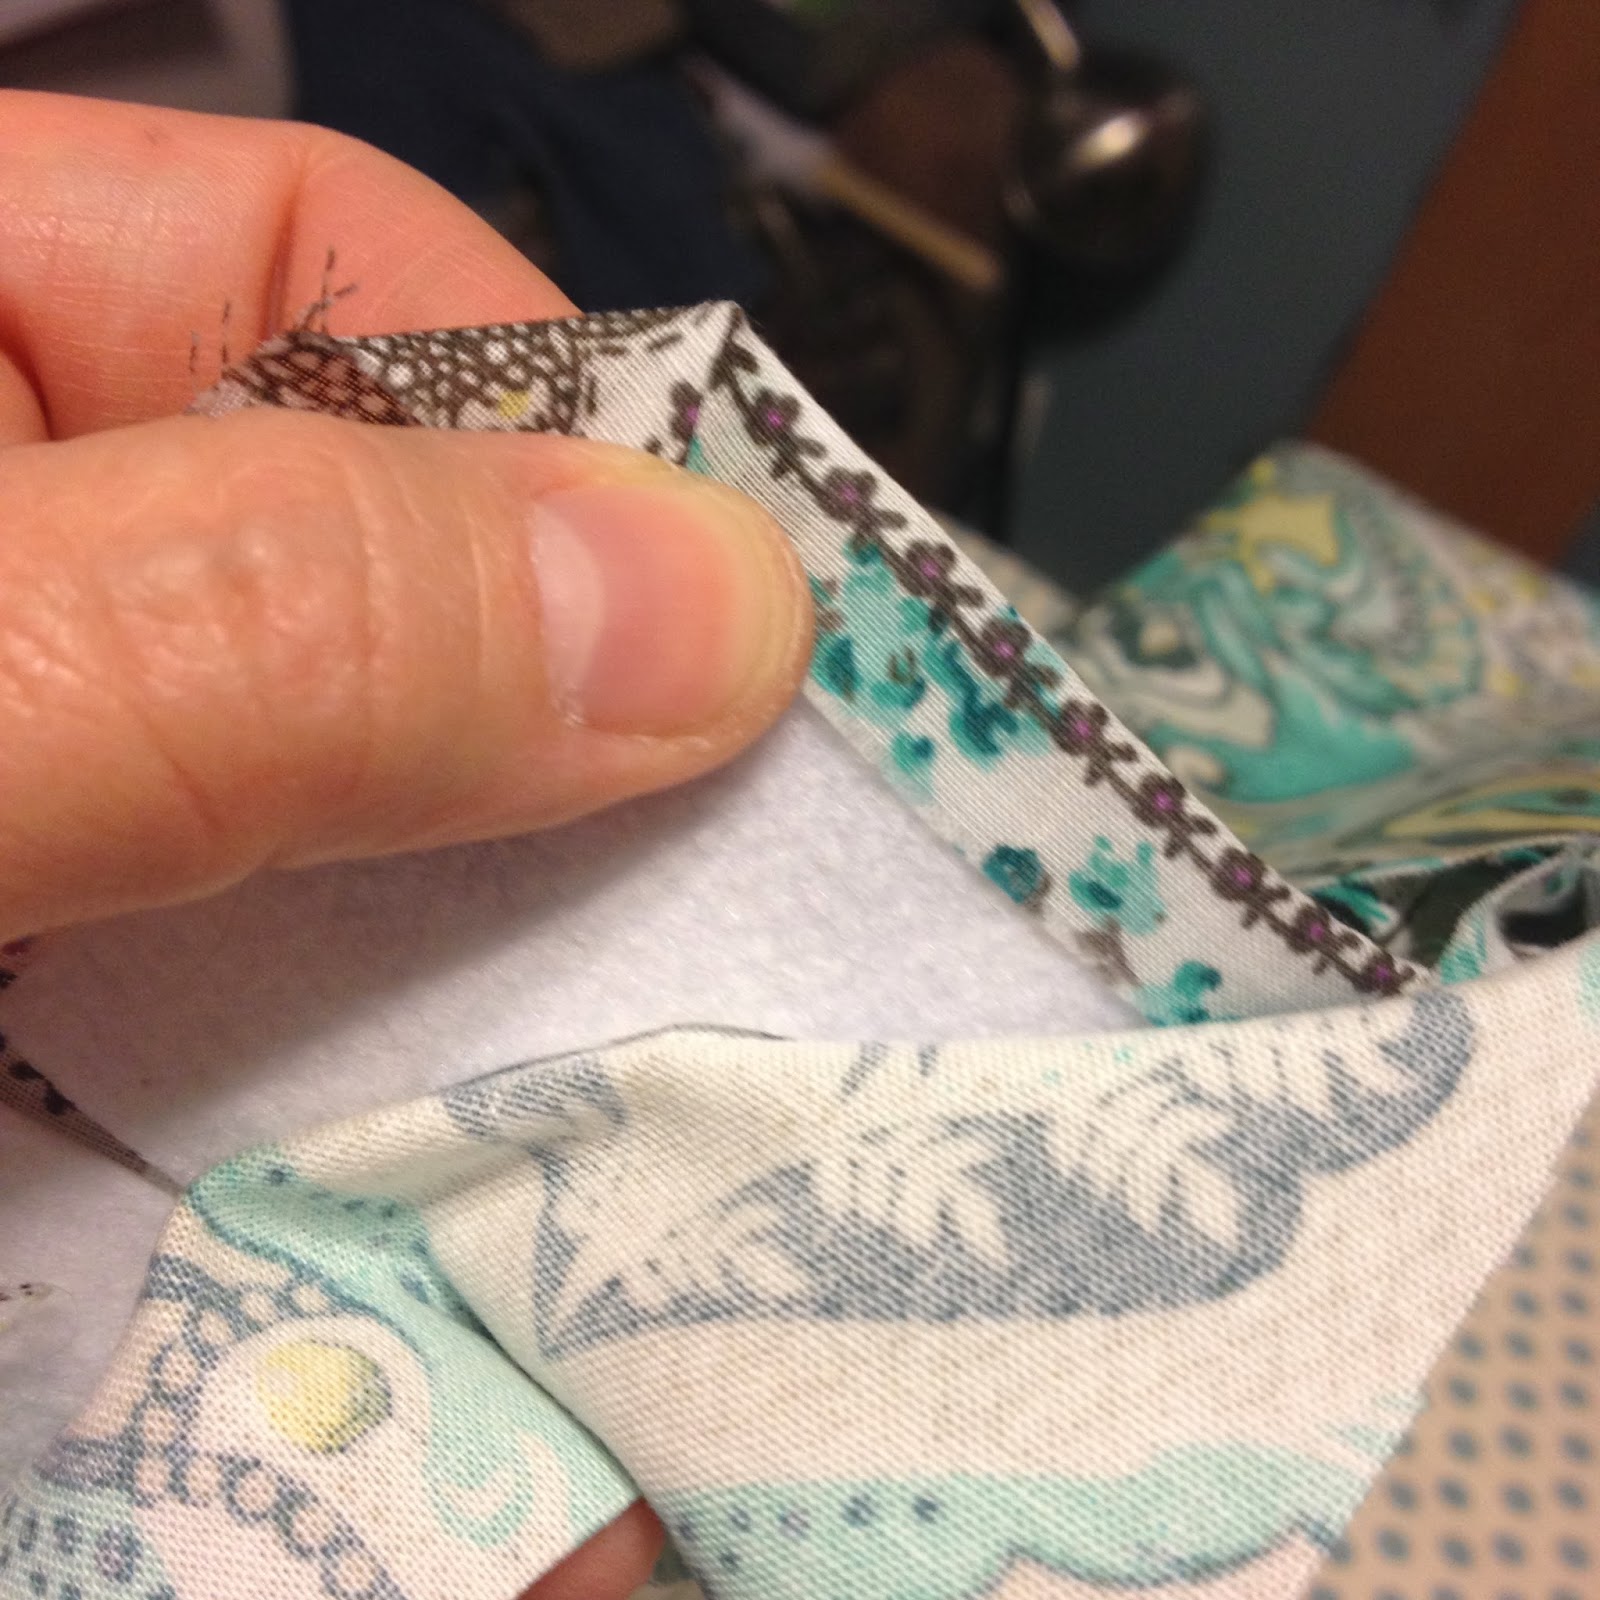
As you see, I left the top edges for last, and they had to be whipstitched together by hand. To make a sharp corner, see below. Fold the corner across at 45°, then the top across that, and then the side across, and it makes a nice angle between the two folded edges. Here you can see I did that process using the Timtex as a guide. Then, because the Timtex was iron-on, I was able to iron these edges onto it, which helped a lot when trying to keep everything together with the outside fabric.
 |
 |
 |
I repeated that corner folding with the outside edges, pinned, and whipstitched all along the edge between the lining and the outside fabric. If you click to enlarge this photo at left, you can see my whipstitching at the very top. You try not to make it obvious, but it's hard to make it absolutely invisible.
You can also see I added a snap.
 |
 |
No comments:
Post a Comment